 |
Michael
Hooker Microscopy
Facility
(MHMF.ORG) |
 |
Perkin Elmer Yokogawa Nipkow spinning disk confocal
Operating the System
Powering up:
- (if everything is off)
- Ensure all electronics are off (except the computer & monitor)
- Turn on the XBO (Fluorescence) lamp
IMPORTANT: All other sensitive electronics
must be turned off before igniting the XBO lamp!
Note: Unlike the mercury arc lamp
(HBO) this Xenon arc lamp does not have to be cool before starting it!
- Turn on the Laser
- Ensure that the STANDBY SWITCH is pulled forward
- Ensure that the power LEVEL knob is turned all the way counter-clockwise
- Turn of the power rocker switch
- Turn the key to START and release--the key will immediately jump to the
ON position
The cooling fan, which is a bit loud, will also start at this time.
- Turn on the power strip next to the monitor. This will turn on
components on the shelf under the table:
- Sutter filter wheel changer
- Prior focus controller
- Hamamatsu camera controller
- Turn on Nikon control box_ switch lower left on microscope stand
- Be sure computer and monitor are on
- Turn on spinning disk head by turning the key two clicks to the right
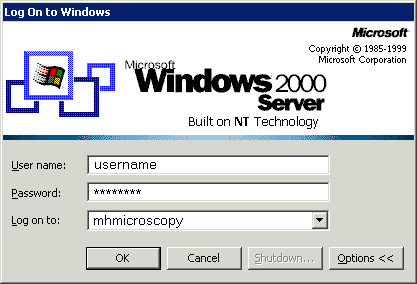
- Log on to the computer using your MHmicroscopy login
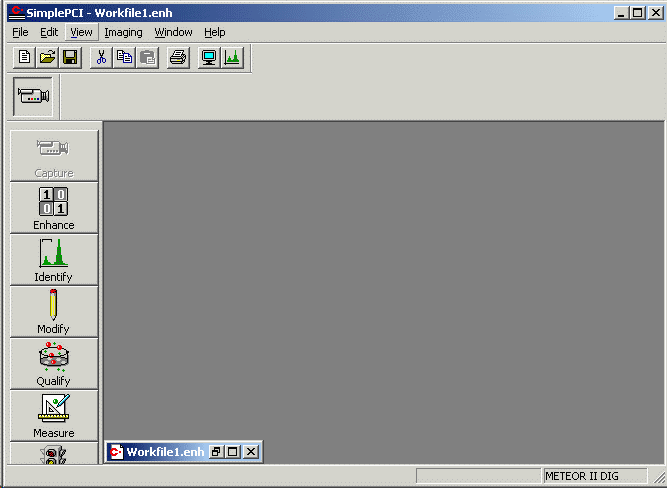
- Start SimplePCI (camera and Sutter Instruments filter wheel must be powered up
before starting C-Imaging)
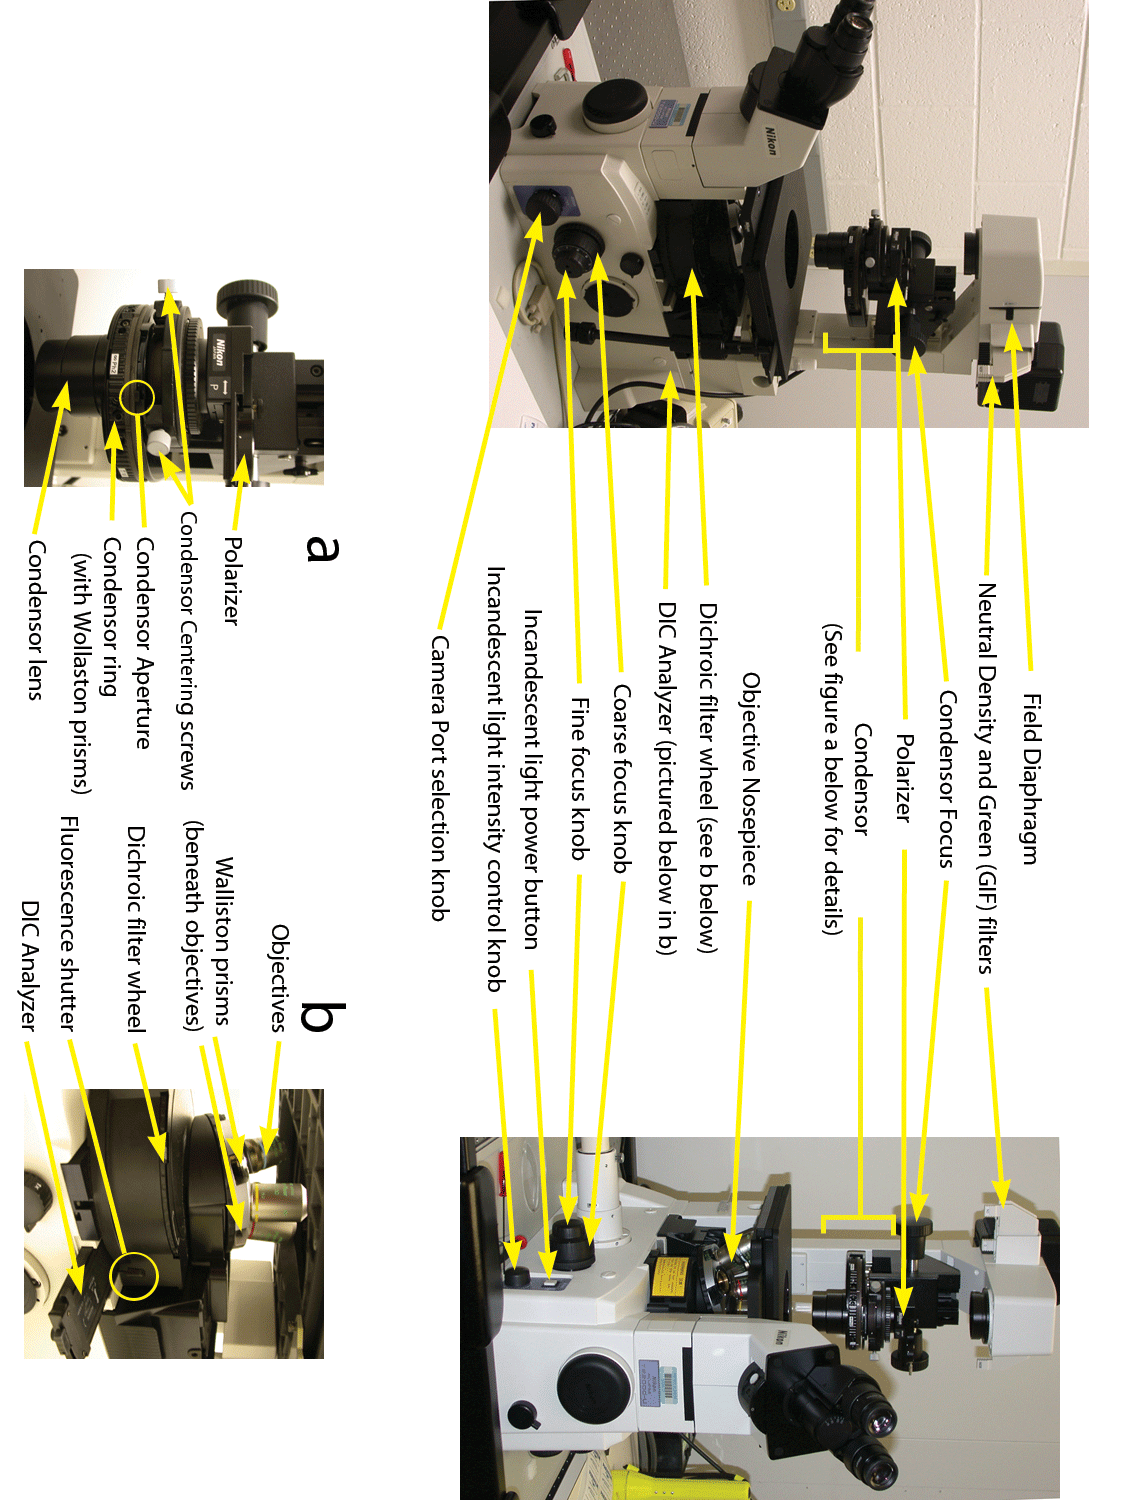
Optical setup
Setting up for transmitted light imaging
--> If transmitted illumination is not required then go to
"for fluorescence only" below
- For all transmitted light modalities, first set up
Kohler Illumination
- Set the transmitted light filters appropriately. For most
applications:
- D is IN on the left side (D = diffuser)
- ND is OUT on the left side; push in to decrease the light
intensity (ND = neutral density filter)
- GIF is OUT on the right side; if it is in, the light will be
green (GIF = green interference filter)
- NCB is IN for normal light (NCB = neutral color balance filter))
- Open field diaphragm (lift up)
- Minimize condenser aperture (push to
the left) - important!
- Set condenser ring to A (brightfield)
- Lower objectives (away from the stage) with coarse focus knob
- Choose required objective. (Generally, choose a lower power dry
objective, locate sample and region of interest and then move to a higher
power dry or immersion objective )
- Select dichroic filter with Nikon control box (epi-filters). Nilon
controller selects light path: left (confocal), right (widefield)
or to binocular (scope)
- Slide out DIC Analyzer (note: lower (objective) Wollaston
prism should be left in the slot
at base of objective)
- Ensure incandescent lamp power is on - switch on with button on left
side of scope body and dial turned to sufficient power
- Place sample on stage--cover slip down since this is an inverted
microscope!
- Focus onto sample
- Close field iris until a dark ring
impinges onto the field of view
- Focus
the image of the ring using the condenser focus knob (above the stage)
- Center the field iris image using the 2 knurled "condenser centering" screws
(at 45°).
- Open field diaphragm to just fill the field of view seen through the
eye pieces
- Open condenser aperture to desired contrast.
Remember: Maximum
resolution is obtained with a fully open aperture, which also gives
minimum depth of focus & contrast and maximum illumination intensity.
- These steps have set up Kohler Illumination!
- Switch to higher power objective if desired
- For optimum image quality, re-check Kohler Illumination setup for
each objective used
- For Nomarski (DIC) - if desired
- Set up for Kohler as described above
- Slide in Polarizer at top of condenser (push to the left; above the stage)
- Open condenser aperture maximally (to the right)
- Select condenser-side Wallaston prism by turning the condenser
turret to ∞H
- Push in Analyzer (below the fluorescence filtercube turret)
- Rotate upper polarizer for optimum contrast
- For Phase contrast
- Set up for Kohler as described above
- Check that the Polarizer (above the stage) is out of the light path (to the right)
- Open condenser aperture maximally. IMPORTANT!!! If the
condenser aperture is closed, you will get NO light!
- Select the correct Phase Ring for your objective on the condenser
turret
- 4X - PhL
- 10X 0.30NA - Ph1
- 20X 0.45NA ELWD corr - Ph1
- 40X 0.60NA ELWD corr - Ph2
- 100X 1.4NA PlanApo - Ph3*
*The 100X Ph3 objective must be obtained from facility
personnel for each use
- All other objectives do not have phase contrast
- Check that the analyzer is out of the light path
- Check that the phase rings are aligned
- Turn the wheel below the eyepieces from "O" (=
oculars) to "B"
(for Bertrand lens)
- While looking down the eyepieces, use the little silver knob on
the eyepiece wheel to focus the Bertrand lens on the phase rings.
You should see a solid dark ring and a light ring consisting of 3
segments.
- If the light ring is completely within the dark ring
- The phase rings are aligned.
- Move the
eyepiece turret back to "O" and continue
- If the light ring is NOT completely within the dark ring:
- Find 2 red-handled Nikon screwdrivers (back of the transmitted light arm,
somewhere on the table or at the other Nikon station)
- Insert the screwdrivers into the inner screw holes of the
Phase ring insert in the condenser turret.
- Turn the screwdrivers gently until the light ring is completely
within the dark ring.
Setting up for fluorescence light imaging
- Lower objectives
- Pull out analyzer slider on right side of scope below filtercube turret
- Choose required objective. (Generally choose a lower power,
locate sample and region of interest and then move to a higher
power)
- Ensure incandescent lamp is off at the switch on the left side of the
scope
- Place sample on stage, cover slip down (This is an inverted
microscope!)
- Choose dichroic filter (epi-filter) with Nikon controller.
- Focus on sample
- Switch to higher power objective if desired
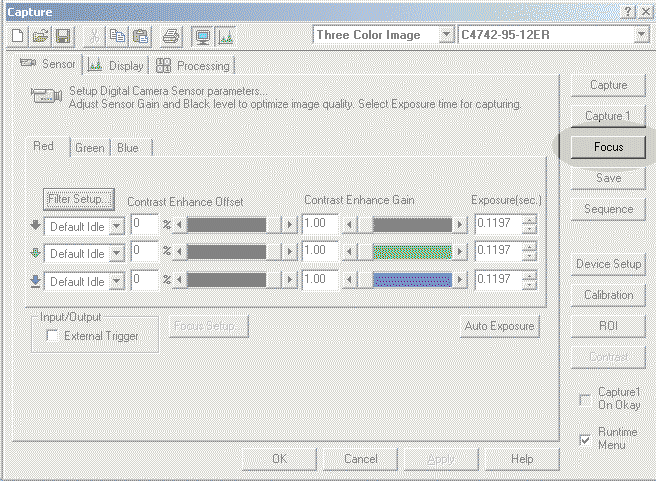
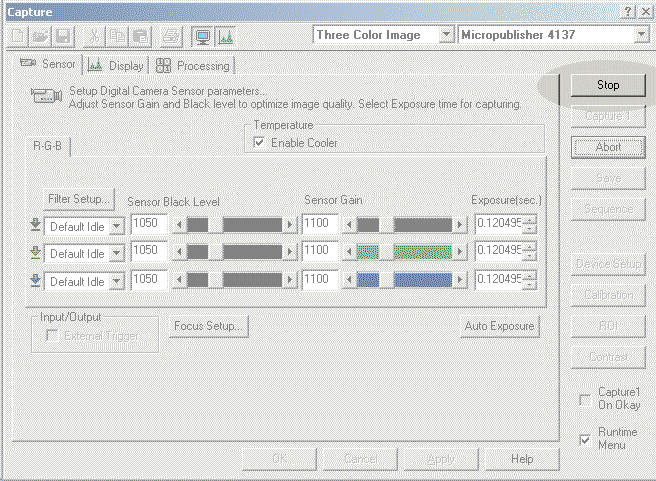
- IMPORTANT: Ensure the spinning disc is in focus. Start SimplePCi.
Select transmitted light from filter choices. With disc off the array
of holes can be seen on the monitor. If image is blurry, adjust the camera
position by loosening the locking ring and move camera in or out as needed
to get sharp image (or see Michael or Neal for assistance).
For imaging:
- Set the microscope light path left camera port - i.e. direct the
image to the scan head (See illustrated position on Nikon controller).
- For a purely confocal image, ensure the microscope brightfield illumination
is switched off (button on let side front of 'scope) and dim the room lights if
necessary.
- Push the Standby switch
- Set laser power knob to 2 O'clock
- Select one of preprogrammed confocal filter sets using SimplePCI and
press Focus in the software (see below) to
illuminate the sample with the laser
- (Optional) To focus with the monocular eyepiece: Pull out silver knob
located beneath the monocular on the scan head. This knob is pointing
towards you and has two positions: out for eyepiece, in for camera. View
confocal image through monocular eyepiece (on top of the white scan head),
while you adjust the microscope's focus knob. You should now be able to see
a single plane of the sample and be able to alter the plane by focusing the
microscope's focus knob. If this image is not sharp, focus the monocular eyepiece
itself, by rotating it until it is comfortably sharp for your vision. Adjust the
illumination power of the laser as necessary, but avoid excessive illumination/photobleaching,
until you get a clear image.
- Push in the scanning head optical path control (silver slider bar) to direct light away from the
monocular and towards the camera. The system is now ready for use.
Acquiring Images Using SimplePCI with the Spinning-Disc Confocal
Shut down SimplePCI and log off when you are finished
Power down procedure:
- Laser off first (the following order is VITAL to the health of the
laser!!)
- Pull standby switch forward
- Wait for ~60 seconds
- Turn power knob counterclockwise until it stops
- Turn key to Off (counter clockwise)
- The cooling fan will shut itself off ~10 minutes after
the key is turned to the "Off" position.
- Exit the SimplePCI software
- Turn off the switch on the power strip next to the monitor. This
turns off the:
- Sutter filter wheel changer
- Prior focus controller
- Hamamatsu camera controller
- Turn off the scan head by turning the key two clicks to the left
- Turn off the microscope incandescent light (left side, front button)
- Turn off the XBO (Fluorescence) lamp (always last!!)
|
 |
Last Updated:
2014-07-24 |