 |
Michael
Hooker Microscopy
Facility
(MHMF.ORG) |
 |
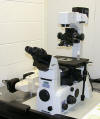
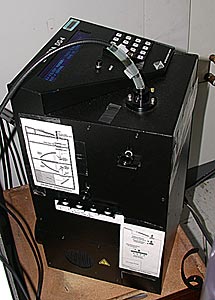
Nikon TE2000U Dual mode / Time lapse
 Introduction:
This high performance widefield microscope system can perform complex and rapid
acquisition tasks such as time lapse, fura-2 and other ratio imaging, and red light DIC with fluorescence (dual mode). Optical modes of operations
are transmitted light, DIC (Nomarski), Phase contrast & Fluorescence.
A good
sensitivity CCD camera with good excitation for fluorescence (when the liquid
light guide is in good condition). See Leo lab. about using this microscope.
Historical information: Similar Michael Hooker
Microscopy Facility scope system was on the \\Morpheus computer.
Book
this scope:
- If you not been trained or received an orientation on this scope please
contact facility personnel.
Warnings:
- Do not look down the eye pieces when changing dichroics on the
microscope carousel. Some filter sets do not have a barrier filter
(emission)
installed and the intense light can be harmful to vision.
- Extreme care must be taken not to damage the intensified camera with bright
light. This camera is usually not attached to the system (power is
disconnected) in order to
protect it from damage.
- Please ensure that the dual head module is set to the "1" position
before starting to use this system, and when you finish up.
Notes:
Powering up:
- (if everything is off)
- Ensure cameras are off
- Ensure
Main switch on the back of the DG4
is in the OFF position
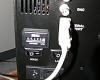
- Turn ON Lamp switch on the back of the DG4
(Main switch must be off. Note this is a Xenon arc
lamp and can be started while it is still warm.)
- Turn ON
Main switch on the back of the DG4
- Turn on Transmitted Light Shutter (set to "remote" and "N.C.")
and toggle to "N.O." then back to "N.C."
- Ensure computer and monitor are on
- Turn on Sutter filter wheel changer if it is going to be used (under the
anti-vibration table)
- Turn on camera(s)
- DVC-1412 with computer Morpheus for fluorescence
- DVC-1312 with computer Wheatstone for DIC with dual imaging
- If using automated multi-color fluorescence, ensure the proper
filters are in the DG-4
- Check Optivar knob is set to 1.0X, unless otherwise desired (right side,
knob is just below the dichroic turret)
- Set Microscope port selector knob (on right side of scope): 1=to oculars, 3=to
camera on RIGHT side, 5=to the cameras on Left side
- If using the left side camera(s), select appropriate filter cube position in the Nikon dual imaging head:
-
| 1=100% to DVC 1312 camera with polarizer (Wheatstone
computer) |
| 2=Fura-2 dichroic (wide band) to DVC 1412
camera & long pass to DVC 1312 for transmitted
light |
| 3=?? |
| 4=100% to DVC 1412 camera (Morpheus computer) |
Setting up for transmitted light imaging
--> If transmitted illumination is not required then go to
"for fluorescence only" below
- For all transmitted light modalities, first set up
Kohler Illumination
- Set the transmitted light filters appropriately. For most
applications:
- D is IN (left side)
- ND is OUT (left side; push in to decrease the light intensity)
- GIF is OUT (right side; if it is in, the light will be green)
- RG/NCB is IN for normal light (if it is out, the light will be
red)
***IMPORTANT: IntensiCam users MUST set this to RG (out)
position!!!
- Open field diaphragm (lift up)
- Minimize condenser aperture (push to
the left) - important!
- Set condenser ring to A (brightfield)
- Lower objectives (away from the stage) with coarse focus knob
- Choose required objective. (Generally, choose a lower power dry
objective, locate sample and region of interest and then move to a higher
power dry or immersion objective )
- Set dichroic filter set to "T" (none)
- Slide out DIC Analyzer (note lower Wollaston should be left in slot
at base of objective)
- Ensure incandescent lamp power is on - switch on with button on left
side of scope body and dial turned to sufficient power
- Open the transmitted light shutter
- Manually: Set the switches on the control box to N.O.
and either Local or Remote
- With the software:
- The switches on the control box need to be set to N.C. and
Remote
- Select the filter setting "Transmitted (uniblitz)"
(see below for software instructions)
- Press the Focus button in the Capture control window
- Place sample on stage--cover slip down since this is an inverted
microscope!)
- Focus onto sample
- Close field iris until you see a dark ring
impinging onto field of view
- Focus
the image of the ring using the condenser focus knob (above the stage)
- Center Field iris using the 2 knurled "condenser centering" screws
at 45°.
- Open field diaphragm to just fill the field of view seen through the
eye pieces
- Open condenser aperture to desired contrast. Remember: Maximum
resolution is obtained with a fully open aperture, which also gives
minimum depth of focus & contrast and maximum illumination intensity.
- These steps have set up Kohler Illumination!
- Switch to higher power objective if desired
- For optimum image quality, re-check Kohler Illumination setup for
each objective used
- For Nomarski (DIC) - if desired
- Set up for Kohler as described above
- Slide in Polarizer (push to the left)
- Open condenser aperture maximally
- Select condenser-side Wallaston prism by turning the condenser
turret to ∞H
- Push in Analyzer
- Rotate upper polarizer for optimum contrast
- For Phase contrast - if desired
- Set up for Kohler as described above
- Check that the Polarizer (above the stage) is out of the light path (to the right)
- Open condenser aperture maximally. IMPORTANT!!! If the
condenser aperture is closed, you will get NO light!
- Select the correct Phase Ring for your objective on the condenser
turret
- 4X - PhL
- 10X 0.30NA - Ph1
- 20X 0.45NA ELWD corr - Ph1
- 40X 0.60NA ELWD corr - Ph2
- 100X 1.4NA PlanApo - Ph3*
*The 100X Ph3 objective must be obtained from
a facility director for each use
- All other objectives do not have phase contrast
- Check that the analyzer is out of the light path
- If the contrast is not good,
- Turn the wheel below the eyepieces from "O" to "B"
(for Bertrand lens)
- While looking down the eyepieces, use the little silver knob on
the eyepiece wheel to focus the Bertrand lens on the phase rings
- If the light ring is completely within the dark ring, move the
eyepiece turret back to "O" and continue
- If the light ring is NOT completely within the dark ring:
- Find 2 red-handled Nikon screwdrivers on the left side of
the transmitted light arm
- Insert the screwdrivers into the inner screw holes of the
Phase ring insert in the condenser turret.
- Turn the screwdrivers until the light ring is completely
within the dark ring
Setting up for fluorescence light imaging
- Lower objectives
- Pull out analyzer slider on right side of scope below filtercube turret
- Choose required objective. (Generally choose a lower power,
locate sample and region of interest and then move to a higher
power)
- Ensure incandescent lamp is off at the switch on the left side
of the scope OR the transmitted shutter is closed
- Place sample on stage, cover slip down (This is an inverted
microscope!)
- Choose dichroic filter set: T=none B=fitc (blue
light) G=tritc/texas red (green light)
UV=dapi (dim dark blue, don't look at it) Important - do not use M or F2 and look down the oculars!
-
Open fluorescence shutter (lever on right side of
microscope beneath filtercube wheel)
- Choose the Focus control in SimplePCI (see below for instructions on
using the software)
- Focus on sample
- Switch to higher power objective if desired
Dual imaging head setup for Fura-2 and transmitted light imaging
We can setup for Fura-2 & CFP & YFP at your request. E.g. see this ref.
J. Physiology 589, 2437
Open this section only for printing:
Acquiring Images Using SimplePCI with the DVC-1412 or DVC-1312
[../SimplePCI/acquisition/SimplePCI-acquire-insert-TE2Kmulti.html]
Powering down
- Turn off the Lamp switch on the back of the DG4 (but leave Main switch on
for now for ~3 minutes)
- Exit C-Imaging (save the last image if required)
- Log out of the computer
- Turn off camera(s)
- Turn off incandescent lamp power (button on the left of the
microscope)
- Turn off the transmitted light shutter
- Turn off Sutter filterwheel controller (under the anti-vibration table)
- Clean immersion objectives used. Blot lens with lens tissue and wipe
surrounding area. Clean up spills on the scope.
- Turn off main switch on the back of the DG4
Equipment Information
Objectives:
- 2x 0.1
- 4x 0.13 PhL
- 10x 0.3 Ph1 dl 1.2 mm wd=15.2
- 20x 0.45 ELWD-Plan Fluor corr=0-2 DIC Ph1 dm wd=7.4
- 40x 0.6 ELWD-Plan Fluor corr=0-2 DIC-M Ph2 wd=3.7-2.7
- *mirror
- *40x 1.3 Plan Fluor DIC-H #1.5 wd=0.2
- *60x 1.4 Plan Apo DIC-H #1.5 wd=0.21
- *100x 1.4NA Plan Apo Ph3 DIC-H #1.5 wd=0.13
- *100x 1.4NA Plan Apo DIC-H #1.5
* = objective not kept on the microscope stand. See a
facility director if you require this objective.
Cameras:
- DVC 1412 - cooled CCD monochrome 1320 by 1033 pixels 12 bit
- DVC 1312 - cooled CCD monochrome 1300 by 1020 pixels 12 bit
- DVC IntensicamII (see a facility director if you require this camera)
Filter Switchers
Filters:
- On Microscope carousel
- FITC
- Rhodamine / Texas Red
- Dapi
- Fura-2 dichroic mirror -- DO NOT VIEW BY EYE
USING THIS CUBE! For camera imaging only
since no excitation or emission filters to oculars!
- *DAPI/FITC/Texas Red -- DO NOT VIEW BY EYE USING THIS
CUBE! For camera imaging only since no
excitation or emission filters to oculars!
- Cy5/Alexa647
- *CFP/YFP -- DO NOT VIEW BY EYE USING THIS CUBE!
For camera imaging only since no excitation or emission
filters to oculars!
- *PRIM
- For use in DG-4**
- 380 nm Fura-2 exciter
- 340 nm Fura-2 exciter
- Blank (open)
- Blocked (metal disk)
- 572/23 nm Texas Red
- 492/19 nm FITC
- 403/12 nm DAPI
- 430/25 nm CFP
- 500/20 nm YFP
- *470/20 nm PRIM
- *410/40 nm PRIM
Filter locations for Morpheus C-Imaging configuration:
-
| |
Dichroic on TE2000 |
DG4 filter # |
| |
|
4 |
3 |
2 |
1 |
| Viewing |
UV (DAPI, etc) OR B
(FITC, GFP, etc) OR
G (TexasRed/Rhodamine) |
|
|
|
open |
| Single Channel |
UV, B, G or R |
n/a |
n/a |
n/a |
open |
| Multichannel |
M (Triple dichroic for TexasRed/FITC/DAPI and
similar) |
403/12 nm DAPI |
492/19 nm FITC |
572/23 nm Texas Red |
|
| FURA |
F-2 |
(old 380nm setting) |
(old 340nm setting) |
380nm |
340nm |
- Complete filter setting table
- Emission Filter Wheel (for multi-color fluorescence without dual
imaging head)
| Updated 2007-11-29 |
|
| FW Pos |
Application |
Spectral info |
| 0 |
OPEN |
|
| 1 |
Analyzer (for DIC) |
|
| 2 |
FITC, GFP, YFP, AF488 |
DS535/40 |
| 3 |
Rhod, TxRed, AF568 |
DS620/60 |
| 4 |
Red (incl Rhod, TxRed, etc) |
DS630/60 |
| 5 |
Green (incl FITC, GFP, etc) |
D535/40 |
| 6 |
Blue (incl. DAPI) |
D470/40 |
| 7 |
Blocked |
|
| 8 |
OPEN |
|
| 9 |
CFP |
D470/30 |
* These filters are not kept on the system. Please contact a
facility director if you require these filters.
** Filters not installed in the DG-4 are found in the plastic drawer labeled
"DG-4 Filters" to the left of the microscope nook. Please
keep filter sets together (ie, CFP+YFP, FURA-2, etc)
Dual imaging head
Dichroic wheel positions:
- 100% to camera on Morpheus computer
- 100% to camera on Wheatstone computer
- Fura-2 dichroic for dual mode imaging
Dual imaging head setup for Fura-2 and
transmitted light imaging
- 100% to camera on Wheatstone computer
Computers:
- Morpheus - DVC 1412 and DVC IntensicamII (for FURA-2, etc.
imaging--See a facility director to use this camera)
- Wheatstone - DVC 1312
 Introduction: